
November 22, 2013
If you are feeling adventurous this Thanksgiving why not smoke your turkey on the grill? I’ve done it for five years and will never go back to the kitchen oven. You get lots and fresh air and free up the oven for the rest of the food. And, nothing tastes better than a bloody mary out in the grill smoke first thing in the morning.
Now, you have to have a “real” grill that takes charcoal not one of those propane powered “deck stoves”. Turning on the gas and pressing a button does not a grill make. Sorry.
Before you smoke your turkey you will need to “brine” it for 24 hours, which is just a fancy term for marinading it in a salt solution. So, get your turkey, grab your large cooler and let’s get going.
The only hard and fast rule I follow for the brine solution is this: half a cup of kosher salt per gallon. Most coolers have their gallon capacity marked on the bottom. My large Igloo cooler is labeled as 52 quarts so that makes it 13 gallons (4 quarts in a gallon). The salt helps your bird absorb and retain fluid.
The rest of the brine solution is made up of the following: 1/2 cup kosher salt per gallon, 2-3 bottles of ginger ale (get the cheap stuff that’s on sale), crushed cloves, 1 box brown sugar, 1 bottle of molasses, 2 boxes of Bell’s turkey seasoning and any other spices you have in your spice rack but never use: garlic, parsley, oregano, bay leaves, rosemary, thyme, etc. Stir to mix all ingredients. Add a bit of hot water to dissolve the sugar if needed.
Remove all the giblets from inside the turkey and rinse it inside and out with cold water. Place the turkey in the cooler and fill almost to the top with cold water. The turkey will float so put something on the inside of the lid to hold it down or put a clean rock on the inside of the turkey. Keep ice inside the cooler to keep the solution cold. Put the cooler on your back porch or deck but beware of curious animals and dogs tracking down the scent. Stir this solution often and flip the turkey a couple of times so that it brines evenly. Replenish the ice as needed.
You also need to soak some wood chips in water overnight or even a couple of days prior if you can manage. You can get these at Lowe’s or Home Depot in the grill section. These come in flavors like hickory, mesquite or applewood. They are all good so experiment with what you like. We are lucky enough to have some applewood trees in the yard so I always have some small logs soaking for use on the grill.

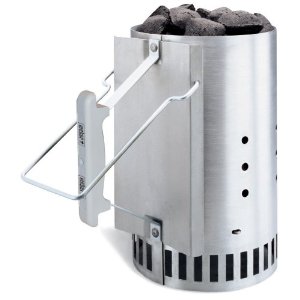
Now, smoking a turkey is mainly a game of coal management. You will need 2 bags of plain charcoal, 1 bag of wood or Cowboy charcoal, 2-3 bags of wood chips, a chimney starter and some newspaper.
I now have a “smoker” type grill (Char-Griller Smokin’ Pro see above) but for a few years I did this on a regular round Weber grill and it worked fine. With the round Weber you just have to make sure the turkey fits on the grill with some space under the dome cover.
In the grill above I put the coals in the side “smoker” and the brine solution pans under the grill but I will continue the instructions as if I were using the old round Weber, as I believe this is more common. The concept is the same. You can always upgrade to this Char-Griller Smokin’ Pro if you enjoy the process. I love it and it is not that expensive. The Char-Griller makes it easier to change out the coals and add the wood chips in the smoker side.
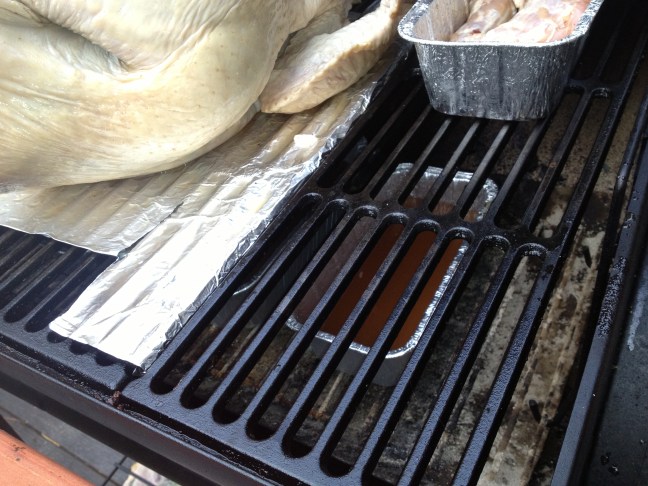
You’ll need some small, rectangular pans (about 3”x6”) as seen on the grill in the upper right above. Fill two of these with the brine solution and place in the center of your grill. These enable a sauna-like effect and give you a “wet heat” so your bird doesn’t dry out.
Put some foil in the center of your grill so as to avoid direct heat hitting the turkey but leave it open on the sides so the heat, steam and smoke can convect inside the grill. You want to cook the turkey with the smoke and the wet heat, not the direct heat from the coals. I also wrap the legs and wings in foil for the first part of the smoking so they don’t get burnt. The skin is not edible after a smoking so don’t be alarmed if it gets really dark. It will keep the moisture in and can be discarded later. You can also lay bacon strips over your turkey to protect the moisture and add a bit of extra flavor.
Heat up some coals in the starter by filling the starter with coals and placing newspaper underneath. Place the hot coals around the pans in the bottom of the grill. The solution will boil which will create that sauna effect. Sprinkle some wet wood chips over the coals and then place the bird on your grill. Close the lid and open the vent just enough to let a steady stream of smoke out. You should be able to hold your hand over the vent for only a few seconds due to the heat. Close your back vents at least halfway or more to ensure that the coals don’t burn too quick but give them enough air so they don’t die.
Now the fun part. Take a good sip from your bloody mary, beer or mixed drink. Throw the football around with the kids. Listen to the football games on the radio. Enjoy the smoky, fresh air. A nice scotch or whiskey also goes nice with the smoke; perhaps, also a nice cigar, if you are so inclined.
Keep an eye on the coals, wood chips and brine solution pans. You want to keep the heat low and slow. There should always be some smoking wood chips on the coals and brine solution in the pans. When you can hold your hand over the vent for more than a few seconds without feeling hot, wet heat coming out start some new coals in the starter and prepare to freshen your setup. I have found that over the course of the cooking time I replenish the coals, chips and brine pans about every two hours.
Follow the cooking time instructions that came with your turkey as a guide but confirm that it is cooked through with a meat thermometer. The turkey is done when a thermometer stuck into the middle of the breast reads around 165-170 degrees. I have found that a 20+ pound turkey takes about 6-8 hours. In the last few hours be sure to remove the foil on the wings and the legs so they cook also. Check the temperature in the center of the thigh also.
To confirm that your turkey is done try pulling off a leg. If the leg comes off easily the turkey is done. If it is still springy or there is red blood present near the joint let it cook a bit longer until the leg almost falls off the bird.
When you have confirmed the bird is done with the thermometer and the leg test, let the turkey sit in its skin for at least 20 minutes and then pull it apart and start your carving. The turkey should be moist and yield clear juices when you squeeze it. The meat at the bottom of the bird is the most flavorful. In fact, if you are really adventurous, during the smoking you can invert your bird for a few hours, at the beginning or end, to ensure extra flavor.
The meat will be a bit salty but your guests will never forget the taste and it will be hard to go back to the plain old bird in the oven. I believe the salt counteracts the tryptophan effect to a certain extent. And, since, the turkey is salty on its own, avoid salty gravies and use a plain clear gravy if possible.
If you have any questions, email me at : dad@dadoffgrid.com and I will be happy to help you out. I’ll have my phone with me on the back deck.
If you are not completely confident, put a back-up turkey in the oven and try the smoking method as a test. If you put the two birds side by side, the oven one may look better but the smoked bird will win the taste test, hands down.
